How To Make Hawaiian Mochi At Home

Picture yourself biting into a soft, chewy, and sweet piece of Hawaiian mochi—right from your own kitchen! The allure of this tropical delight is undeniable, and the good news is that you don’t have to travel to Hawaii to enjoy it. Learning to make Hawaiian mochi at home is not only possible but also a rewarding culinary adventure. This post will guide you through each step of the process, from gathering the right ingredients to customizing your mochi to your heart’s content. So, if you’re ready to bring a piece of Hawaiian paradise into your home, read on!

Ingredients You’ll Need

How To Make Hawaiian Mochi At Home

The first step in your mochi-making journey is gathering the right ingredients. Depending on your flavor preferences, you’ll need rice flour, coconut milk, sugar, and a few other items. While it might be tempting to opt for cheaper alternatives, remember that the quality of your ingredients will directly impact the taste and texture of your mochi. High-quality ingredients not only make your mochi taste better but also make the cooking process more forgiving.

Now that you know what you’ll need, you might be wondering where to find these ingredients. Most of them are readily available at your local grocery store, but for specialized items like glutinous rice flour, you might need to visit an Asian market. If you’re looking for organic or specific brands, online stores can be a convenient option. The key is to plan ahead so that you have everything you need before you start cooking.

Essential Kitchen Tools

How To Make Hawaiian Mochi At Home

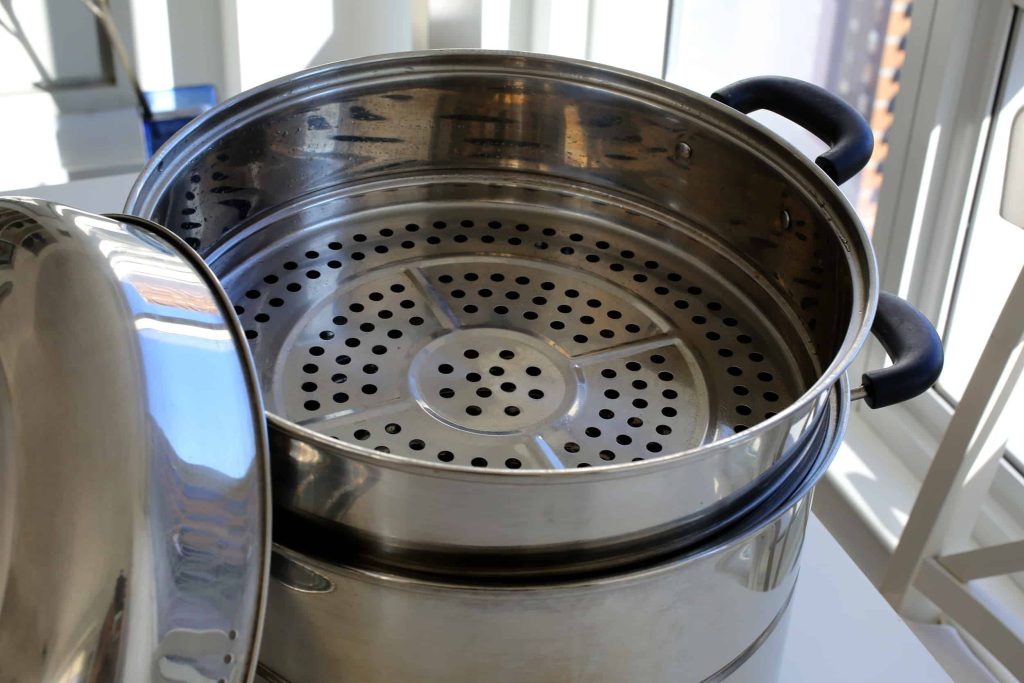
Before diving into the cooking process, let’s talk about the kitchen tools that will make your life easier. At the very least, you’ll need mixing bowls, a spatula, and a steamer. If you don’t have a steamer, don’t worry; a large pot with a lid and a heat-safe bowl can work as a makeshift steamer. These tools are essential for mixing your ingredients and cooking your mochi to perfection.

In addition to the must-have tools, there are a few optional items that can enhance your mochi-making experience. Silicone molds can help you shape your mochi into uniform sizes, and food coloring can add a vibrant touch to your creations. While these tools are not strictly necessary, they can make the process more enjoyable and the end result more aesthetically pleasing.

Preparing the Mochi Batter

How To Make Hawaiian Mochi At Home

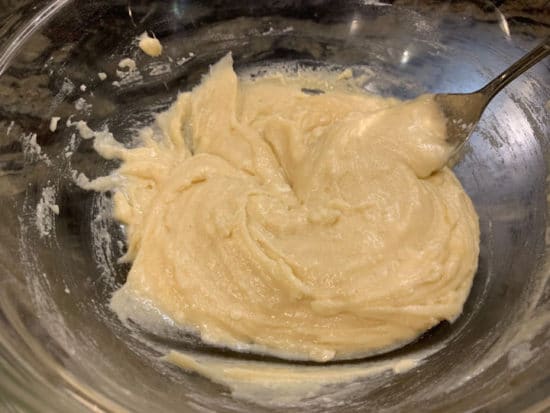
Now that you’re armed with the right ingredients and tools, it’s time to prepare the mochi batter. Start by mixing the rice flour, coconut milk, and sugar in a large bowl. The goal is to achieve a smooth, lump-free batter, so take your time and mix thoroughly. If the batter seems too thick or too thin, you can adjust the consistency by adding a little more liquid or rice flour.

Once your batter is ready, it’s time to add any flavorings or colors you desire. Whether it’s a splash of vanilla extract or a spoonful of matcha powder, this is your chance to get creative. Just remember to mix in any additional ingredients thoroughly to ensure even distribution throughout the mochi. With your batter prepared, you’re now ready to move on to the cooking process.

Cooking The Mochi

How To Make Hawaiian Mochi At Home

The moment has arrived: it’s time to cook your mochi batter. You have two main options here—steaming or microwaving. Steaming is the traditional method and often yields a softer, chewier texture. To steam your mochi, pour the batter into a greased or lined steaming tray and steam for about 20 to 30 minutes. The cooking time may vary depending on the thickness of your batter, so keep an eye on it.

For those that are short on time or don’t have a steamer, microwaving is a quicker alternative. Pour the batter into a microwave-safe dish and cook in intervals, stirring in between, until the mochi reaches the desired consistency. While microwaving is convenient, it may result in a slightly different texture compared to steaming. Either way, once your mochi is cooked, it should be slightly translucent and very sticky.

Customizing Your Mochi

How To Make Hawaiian Mochi At Home

You’ve successfully cooked your mochi, but why stop there? Now comes the fun part—customization. You can add fruit extracts, chocolate chips, or even a dollop of your favorite jam in the center for a filled mochi experience. The sky’s the limit when it comes to flavors, so don’t hesitate to get creative.

If you’re looking to make your mochi even more visually appealing, consider using food coloring. A drop or two can transform your mochi into vibrant, eye-catching treats. Whether you’re making mochi for a special occasion or just to satisfy your own cravings, a splash of color can make your creations truly stand out.

Storing And Preserving Your Mochi

How To Make Hawaiian Mochi At Home

So you’ve made a batch of delicious, customized mochi. What’s next? If you’re not planning to eat all of it immediately, proper storage is crucial. For short-term storage, an airtight container in the refrigerator will keep your mochi fresh for up to a week. Just make sure to separate the pieces with parchment paper to prevent sticking.

For those looking to enjoy their mochi at a later date, freezing is an excellent option. Place the mochi pieces in a single layer on a baking sheet and freeze until solid. Once frozen, transfer them to an airtight container and store them in the freezer for up to a month. When you’re ready to eat, simply thaw at room temperature.

Serving Suggestions

How To Make Hawaiian Mochi At Home

You’ve made it! Your mochi is cooked, customized, and stored. Now, how do you serve this delightful treat? In Hawaii, mochi is often enjoyed as is or with a sprinkle of coconut flakes. It’s a versatile treat that pairs well with a variety of flavors.

If you’re looking for a modern twist, why not incorporate your homemade mochi into other desserts? Imagine a scoop of ice cream topped with chewy mochi pieces or a parfait layered with mochi, fresh fruits, and whipped cream. The possibilities are endless, and each serving suggestion offers a unique way to enjoy this delicious treat.

The Final Scoop: Wrapping It Up

Congratulations, you’re now a mochi-making expert! From selecting top-notch ingredients to mastering the cooking process and exploring endless customization options, you’ve embarked on a rewarding culinary journey. Making Hawaiian mochi at home is more than just a cooking task; it’s an experience to savor and share. So go ahead, indulge in your homemade tropical delight, and don’t forget to share your mochi masterpieces with the world!

Leave a Reply

Your email address will not be published. Required fields are marked *

This site uses Akismet to reduce spam. Learn how your comment data is processed.